
Screen Tone Etching with Clip Studio Tools
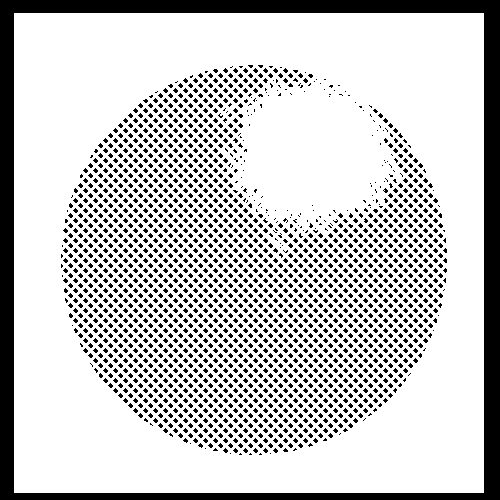 Welcome, young artist of comics! Here at Comics for Grownups we like to explore the technical side of comic art on occasion, so please read this article to learn about tone etching, and how you can use the tools in Clip Studio to make tone etching easy (and fun)! I wrote this article because I couldn’t find much information (in English, anyway) about how to make Clip Studio Tools that etched tone in the traditional Japanese way. I did some research, and this page shares what I've found out so far.
What is Screen Tone Etching?
Screen tone etching is a process that alters the appearance of screen tone on a comic page to create the illusion of light and shadow on a figure.
What’s Screen Tone?
Screen tone is made up of tiny dots of different sizes. The dots are binary, black or white, and arranged in a uniform pattern. The differences between screen tones are defined as follows:
- the number of lines of dots that appear in an inch (for example, 60.0 tone has sixty dots in a square inch) and
- the percentage of space that the dots take up (for example, “dark” screen tone is 50%, which means that 50% of the space is dark and 50% is light).
The Clip Studio tool includes a bunch of different screen tones.
To find Screen Tones in Clip Studio, open your materials folder, and click on
Monochromatic Pattern > Basic
In this folder you will find three types of standard screen tones: dot, parallel line, and sand pattern.
The easy way to use these tones is to use the selection tool to select an area in your drawing, and then drag one of the screen tones on top of the drawing. This will fill the entire area you’ve selected with a screen tone.
Where did Screen Tone Etching come from?
Back in the old days, when the ancient people could only make paper comics, they used physical sheets of screen tone to put on the drawings they made. The screen tone had an adhesive, transparent backing, and they would rub the tone to stick the tone to the drawing. Then, the ancient comic artists would use a craft knife to alter the shape and construction of the screen tones.
Cutting away small parts of the tone with a craft knife let artists depict the subtle play of light over the curving or straight forms appearing in their comic panels.
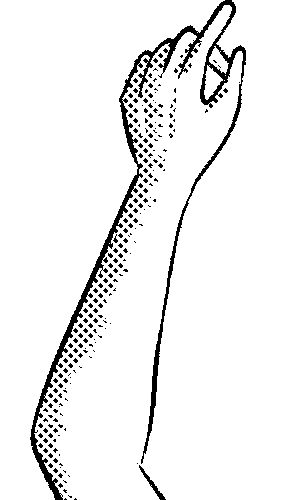 For example, on a cylindrical form such as an arm, the edge of the shadow fades as the curvature of the arm turns farther and farther away from the light. Using a craft knife on the tone applied to the arm replicates this natural phenomenon by breaking up the uniform pattern of the tone. Pretty cool, huh? The arm at right is a low-resolution image to better illustrate what's going on. When you're doing your own tone etching on your computer, make sure to set the image resolution for your image to 600. Ultimately, these are techniques for the printed page, and not for the web (that's another discussion), and if the resolution is less than 600 your tone etching will look bad when you print it.
It’s called “etching” because old-timey Japanese comic artists would use a craft knife to physically cut away little tiny pieces of the tone, one chip at a time. It’s a laborious process, but screen tones by themselves look kind of flat. Etching the tone improves the illusion of three-dimensionality in your drawings.
How do you use Clip Studio Tools for Tone Etching?
Good question! Thank you for asking, I thought you would never get around to it. I have been searching for an answer for this question for a long time. I like Clip Studio a lot, it seems like they developed it with comic artists in mind. Clip Studio has a bunch of tools like word balloons, inking brushes, etc. It’s a lot better than Adobe Photoshop or whatever because Adobe Photoshop was made for graphic artist jerks who spend their days making chyrons for ESPN. Only Clip Studio thinks about the art of comics.
But while Clip Studio’s inking and word balloon tools are easy to find, the tools that allow you to etch screen tone in a convincing manner are hard to find, and you have to end up modifying them. But I think it’s worth it.
The physical method of tone etching with a craft knife
The problem that Clip Studio gives us is that screen tone etching techniques were first developed as a physical craft, and we want to try to duplicate the appearance as closely as possible with our computer screens and drawing tablets (because it looks way nicer).
For example there is this video here:
You see that the person with the craft knife first carves into the tone a series of evenly spaced parallel lines slanted in one direction, and then changes direction, making a bunch of new parallel lines in a “herringbone” pattern. As the knife drags over the surface of the tone, it tears off little bits of it, leaving a transparent backing beneath. Because the artist uses the side of the craft knife, they scrape away patches of tone. As the parallel lines get closer together, the tone patches are scraped off in more and more irregular ways. Finally, the artist uses a dusting brush to get those little tiny bits of tone off.
The irregularity, I think, is what gives good etching its unique look. Computers can’t give us that irregularity, at least not right away. Computers are digital, and the tone etching methods are analog. How do we split the difference?
Using Clip Studio Tools for Tone Techniques
There are a ton of different traditional tone etching methods that Japanese artists have developed over decades. in this article, I’ll try to focus on how to make Clip Studio tools that replicate the most popular etching methods here, and leave discussion of techniques to the professionals. However, if you want to learn more about tone etching, make sure to pick up How to Draw Manga’s two tone etching books:
- Pen and Tone Techniques by Ryo Toudo
- Super Tone Techniques by Unkaku Koyama
Interested? This page is where you can learn more about the different types of tone etching strokes and how to use them with Clip Studio tools. As time passes, I will add links to each of these that explain the tool and how to use them. To get started, the tone etching tools are located in Clip Studio's "Decoration" tool, just look for the "Hatching and sand pattern" sub-tool.
In a nutshell: select a likely tool from the "Hatching and Sand Pattern" sub-tool, set the background color to "Clear" (that is, the color with the gray checkerboard pattern)
and staaaaaaaaart etching!
What are the stroke types and tools for different tone etching methods?
The answers are in this table here. You can click on the Harakezuri link to learn more about patch tone etching, and I'll add other tools later, but for right now, the pictures here show what each tone etching tool looks like when applied to tone.
| Hara Kezuri (Patch Etching) | 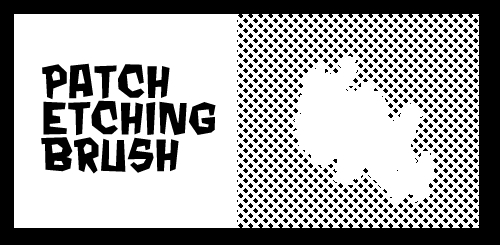 |
| Hikka Kezuri (Tap Etching) | NO IMAGE YET (Still Figuring it out!) |
| Flash Etching | 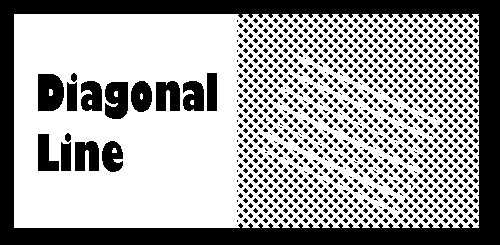 |
| Kaki Kezuri (Illustration Etching) | NO IMAGE YET (Still Figuring it out!) |
| Bokashi Kezuri (Blur etching) | NO IMAGE YET (Still Figuring it out!) |
| Sunakeshi (Eraser etching) | 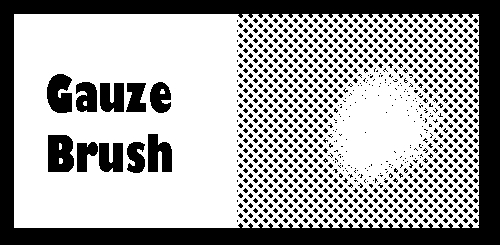 |
| Double stroke | NO IMAGE YET (Still Figuring it out!) |
| Single stroke | NO IMAGE YET (Still Figuring it out!) |
| Eventually: DIY Tone Etching Tools | NO IMAGE YET (Still Figuring it out!) |
Thanks for reading!
